CasperVend 2/Setup: Difference between revisions
| (285 intermediate revisions by one other user not shown) | |||
| Line 1: | Line 1: | ||
{|align=right | {|align=right | ||
|__TOC__ | |__TOC__ | ||
|} | |} | ||
[[File:German_flag.gif]] [[CasperVend 2/Setup/DE | Schaue hier in Deutsch!]] | |||
= '''<span style="color:#00528c">CasperVend Manual</span>''' = | |||
This is the main manual page for CasperVend. If you need it, the table of contents for this page is to the right. | |||
If you are here to see what's involved with setting up the system before buying it, you might also be interested in seeing the '''[[CasperVend_2/Feature_List | Feature List]]''' and find out '''[[CasperVend_2/Introduction | Whats in the Box]]''', in addition to the instructions below. If these instructions are too much for one sitting, you can also try the '''[[CasperVend_2/Quick_Start | quick start page]]'''. | |||
= '''<span style="color:#00528c">The Fine Print</span>''' = | |||
=== Prerequisites === | |||
---- | |||
The manual on this page assumes the following: | |||
# That you understand the setup processes behind web-enabled networked vending systems | |||
# That you understand debit permissions need to be granted in order for all scripted vendors to function | |||
# That you have at least one product to sell | |||
# That you have at least one promotional image for each product to sell | |||
# If your product is in multiple pieces (such as an outfit), that you have put the product in a shipping package of some sort. | |||
If any of these concepts are unclear, or you have '''never''' extensively used a web-enabled networked vending system before, you should begin at the '''[[CasperVend_2/Quick_Start | New User Quick Start]]''' instead, where the instructions are simplified and explained for people who are not as familiar with these concepts. | |||
=== Allowable vs. Non-Allowable Items === | |||
---- | |||
Any product which is permitted to be sold in the grid it's available for - according to the grid's Terms of Service - is also permitted to be sold via CasperVend. | |||
While not exhaustive, some items which are explicitly '''not allowed''' include: | |||
:* Any item(s) depicting or suggesting the abuse or sexual solicitation of minors | |||
:* Any item(s) which are designed to defraud or commit a crime (or entice others to defraud or commit a crime) | |||
:* Any item(s) which violate or are intended to violate or entice others to violate UK or international law | |||
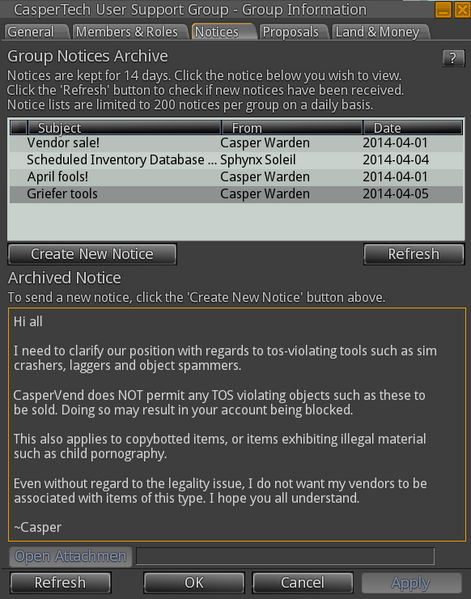
:* Any items which '''[https://wiki.casperdns.com/images/thumb/4/4a/Notice_-_No_Griefing_Tools.png/471px-Notice_-_No_Griefing_Tools.png violate the grid's Terms of Service]''' (sim crashers, object spammers, copybot tools and the like) | |||
==== DMCA's ==== | |||
---- | |||
'''PLEASE NOTE: CasperTech is not in control of products for sale in CasperVend vendors''', only the vending system which can access them - this means we are not in a position to comply with a DMCA notice (we cannot actually remove the content from the virtual world grid). Each merchant is responsible for ensuring that their products do not violate anyone else's copyrights. | |||
DMCA takedowns need to be filed with the owners of the virtual world grid directly, as it is their system (the grid) which is actually serving the content. In the case of Second Life, the owners are Linden Lab. | |||
=== Terminology === | |||
---- | |||
CasperTech (and thus CasperVend) does do a few things differently from other web-enabled networked vending systems. This manual uses the following terms that may not be used by other web-enabled networked vending systems: | |||
:* '''DropBox''' - Your packaged products go in here, and are delivered to your customers from here. The DropBox '''MUST''' be rezzed at all times, or it will be unable to deliver products to your customers. | |||
:* '''Item''' - "Items" are the things you put inside your DropBox. "Items" can be your packaged products, informational notecards, landmarks, and so on. | |||
:* '''Product / Product Listing''' - These are created on the website using your items, and each listing includes information about your product including price and permissions. All product settings are on one page for ease of setup. | |||
= '''<span style="color:#00528c">Your Account</span>''' = | |||
=== Security Notes === | |||
---- | |||
Protect your business by following these tips, and keep your account safe. | |||
:* Choose a password which is difficult to guess. | |||
:* Do '''''NOT''''' use your Second Life password. | |||
:* Do '''''NOT''''' use a password you've used with any other Second Life related service, such as other vending systems. | |||
:* Do '''''NOT''''' give your password to anyone! | |||
If you have trouble coming up with a secure password on your own, you can use the '''[https://www.grc.com/passwords.htm Gibson Research High Security Password Generator]'''. | |||
If you need a "password keeper" utility on windows, you can try '''[http://passwordsafe.sourceforge.net/ Password Safe]''' | |||
=== Creating Your Account === | |||
---- | |||
Before you can begin setting up products on the website, you need to have a CasperVend account. If you already have one, just log in. | |||
Otherwise, rez out a CasperVend vendor of your choice, grant '''[[Debit_Permissions | debit permissions]]''', and then follow the instructions on the '''[[CasperVend_2/Password_Reset#Creating_Your_CasperVend_Account | Creating Your CasperVend Account]]''' page. | |||
== ''' | === Resetting Your Password === | ||
---- | |||
See the section on '''[[CasperVend_2/Password_Reset#Resetting_Your_CasperVend_Password | Resetting your CasperVend Password]]''' | |||
= '''<span style="color:#00528c">Setting Up Products</span>''' = | |||
=== Setting Up Your Dropboxes === | |||
---- | |||
See the '''[[CasperVend_2/DropBoxes | DropBoxes]]''' page for important details and instructions on setting up your DropBoxes. | |||
If your DropBox(es) won't let you add things, pay careful attention to '''[[CasperVend_2/DropBoxes#Your_DropBox_won.27t_let_you_add_things.3F | this section]]''' for troubleshooting points. | |||
=== Set Up Product Listings === | |||
---- | |||
First, if you haven't already, rez a vendor and grant '''[[Debit_Permissions | debit permissions]]'''. | |||
Then: | |||
# Click on the (C)asperVend logo in the bottom left hand corner of one of your vendors. | |||
# Visit the link that appears in local chat, and enter your password if necessary. | |||
# Now, click "Products" on the left hand side. | |||
# Click "+ List New Product" to create a new product. | |||
# Fill out details about your new product, then click Save. | |||
# Pay attention to any menu/popup messages you receive - they have very important information! | |||
If you are selling products that have a license the user needs to agree to, see the '''[[CasperVend_2/Product_License | Product License]]''' page. | |||
== | ==== Minimum Essential Product Information ==== | ||
---- | |||
# Item to be delivered | |||
# Name of product | |||
# Vendor picture for product | |||
# Price of product | |||
# Permissions for product (this controls whether redelivery is allowed) | |||
To see details about the various product options, read the '''[[CasperVend_2/Product_Options | product options]]''' page. | |||
'''Getting the picture UUID:''' Right-click on the vendor image in your inventory (it needs to be full perm TO YOU) and select "copy UUID". | |||
: | |||
==== Listing Notes ==== | |||
---- | |||
You will note that it IS possible to set up a listing without delivering a product. This capability is useful for when you want to track sales but aren't vending something tangible that gets sent to the customer. | |||
If the listing is not pointed TO the product, whether intentional or accidental, the transaction log will show the message: | |||
'''''"No item configured on this product for delivery, so skipping delivery phase."''''' | |||
==== New Version of Old Product ==== | |||
---- | |||
If you update an older product, just drop the new product in the vendor, and re-point product listing on the website to the new version. | |||
Alternately, you can name the updated product to EXACTLY match the earlier version, delete the old version out of the dropbox, and replace it with the new version - and not have to edit the website listing at all. | |||
== | === Delivery Options === | ||
---- | |||
The default method is to use the scripted DropBox for all product deliveries. | |||
If you are using a SmartBots Personal Bot, however, you can also take advantage of the bot delivery system. You are '''NOT REQUIRED''' to use a bot for delivery, but it is worth considering if you have products which are no-copy to the customer - the SmartBots bot delivery allows for a comfirmation of the product's arrival to the customer. | |||
For information on using SmartBots for bot delivery, see the '''[[CasperVend_2/Bot_Delivery | Bot Delivery page]]'''. (At this time, other bot systems do NOT offer the scripted feedback calls necessary for the bot delivery function.) | |||
=== | === Product Permissions === | ||
---- | ---- | ||
One of the things the website asks for when you enter your product details is "permissions". Please be aware that this '''does not actually change the permissions''' set to your objects, but instead the information about the permissions will simply be told to the customer as an advisory. | |||
In addition, any products which are set to COPY '''on the website''' will be claimable by customers as a redelivery - so be careful when setting this flag. See the '''[[CasperVend_2/Redeliveries | redeliveries]]''' page for more information. | |||
'''NOTE:''' The website cannot read or change permissions on anything you have in the dropbox. This is why it is CRITICAL to set your permissions properly on both your product AND the website. | |||
:* If you are selling items which are no-copy to you, the merchant/owner, (such as breedable items) see the '''[[CasperVend_2/Limited_Availability | Limited Availability]]''' page. | |||
:* If you are selling limited edition items (limited number on the grid, but merchant/owner has copy AND transfer permissions), see the '''[[CasperVend_2/Limited_Edition | Limited Edition]]''' page. | |||
=== | === Set Up Product Variants (if desired/needed) === | ||
---- | ---- | ||
'''Here's how to set up a product variant:''' | |||
:'''1)''' Go to the product listing you want to make a variant OF. | |||
:'''2)''' Click "Add Variant", right above the blue PrimBay section. | |||
:'''3)''' To set up a product variant, add in the information for: | |||
::* Name (of product, as will be shown in statistics) | |||
::* Item (to be delivered) - use the pulldown to select the product. You may use the radio button for "only objects" to only show you product packages without also showing notecards, landmarks, etc. | |||
::* Texture (the picture for the vendor) | |||
::* Price | |||
::* customer permissions (this controls whether it can be redelivered, and does NOT set permissions on anything in the DropBox.) | |||
At this time any '''OTHER''' options you wish to have that are different from the parent product (such as limiting how many can be sold inworld, or a holo/demo of a specific variant) are '''NOT''' able to be done with a variant - these will need to used on a full separate product listing. | |||
Repeat the above steps for each variant you want to add to the parent product. | |||
If | '''If the variant already exists, you may use the additional options to:''' | ||
::* Remove any existing marketplace association (if it was incorrectly associated) | |||
::* Delete the variant | |||
::* Detach the variant | |||
==== | ==== Pros & Cons of Variants ==== | ||
---- | ---- | ||
Some merchants find it useful to list products as variants of a main product. Hair, clothing or shoes in different color packs can easily be set up as variants, or if you want to have a vendor picture display slightly different for an event, but do not want your main vendor location(s) to have the event-related picture. | |||
Variants are currently (March 2014) treated as separate products everywhere '''BUT''' within the product listings. Each variant will have its own entry in your statistics (so you can track them separately), and may be added as individual items to different profiles and groups (so you can have all black shoes, all red shoes, etc.) | |||
==== What Variants Can & Cannot Do ==== | |||
---- | |||
You are able to detach a variant to make the variant a full product with all options. however at this time you cannot turn a full-featured product into a variant of another. | |||
You '''are''' able to point both a variant '''AND''' the primary product to the SAME product package in your DropBox. | |||
=== | === Limited Items === | ||
---- | ---- | ||
CasperVend can handle items that are either limited in availability (no-copy items such as fish or breedables) as well as "limited editions" where you as the owner-merchant have both copy/transfer permissions, but you are only allowing a certain number to be sold on the grid. | |||
For details on how to set up items which are no-copy to you, see the '''[[CasperVend_2/Limited_Availability | Limited Availability]]''' page. | |||
For details on how to set up items which you, as the owner-merchant, have copy/transfer perms for, but are only allowing a limited number to be sold, see the '''[[CasperVend_2/Limited_Edition | Limited Edition]]''' page. | |||
=== | === Giving Free Gifts To Customers Via Vendors === | ||
---- | ---- | ||
See the '''[[CasperVend_2/GroupGifts | group gifts]]''' page for info. | |||
=== | === Profiles & Groups === | ||
---- | ---- | ||
For information on how to group your products together and only show certain collections in certain vendors, see the '''[[CasperVend_2/Profiles_and_groups | Profiles & Groups]]''' page. | |||
=== Updating Existing Products (Individually) === | |||
---- | |||
# Delete the original product package from the DropBox | |||
# Rename the new product package to match the old product package name | |||
# Drop the new product package in the DropBox. | |||
# Wait for the DropBox to finish uploading data | |||
# All set! As long as the new package has the '''SAME''' name as the old package, you don't need to change anything on the website. | |||
'''If you have a different name on the product package for the new version (such as "v2" or the like) then:''' | |||
# Delete the original product package from the DropBox | |||
# Drop the new product package in the DropBox | |||
# Wait for the DropBox to finish uploading data | |||
# Log in to the CasperVend website | |||
# Edit the product listing for the updated product | |||
# Point the product listing to the NEW product package (see '''[[CasperVend_2/Product_Options | this page]]''' for details) | |||
# Click "save" at the bottom. | |||
# All set! | |||
=== Updating Existing Products (in bulk) === | |||
---- | |||
The bulk update block is located '''below''' the product listings. This '''cannot''' be used to "bulk list" new items - it is only designed to bulk-update products that have already had listings set up. | |||
You can use this section to globally update things like textures, prices, etc. that will take effect on '''ALL''' products currently selected. If you have not ticked any boxes, or have not used the "all" option at the bottom of the list, changes you make in the bulk section will NOT actually happen. | |||
= '''<span style="color:#00528c">Setting Up Vendors</span>''' = | |||
When you first rez a particular vendor, you will be asked for debit permissions. '''All vendors need debit permissions in order to function, but you should always read the orange/yellow popup to make sure it's YOUR vendor.''' | |||
See the '''[[Debit_Permissions | Debit Permissions]]''' page for a detailed explanation. | |||
=== | === Configuring Single-Product Vendors === | ||
---- | ---- | ||
For vendors which are designed to show only one product, there is a shortcut you can use to quickly configure them. | For vendors which are designed to show only one product, there is a shortcut you can use to quickly configure them. | ||
# Rez the vendor | |||
# Grant debit permissions (the vendor won't function without them) | |||
# Access the vendor configuration page, by clicking the (C)asperVend logo in the bottom left hand corner of the vendor. | |||
# Look for the configuration option called "Single Product" | |||
# Simply switch the Single Product pulldown selector to the product you wish to show. | |||
=== | Once you have configured the basics on any vendor, you can shift-drag them in "edit" mode and they '''will keep''' the configuration from the original vendor (group settings, affiliate percentages, etc.) - you will still need to answer debit permissions for the new copy, of course, but the only other thing you'll need to do is change the single product that is assigned to it. | ||
=== Configuring Multi-Product Vendors To Show Specific Products === | |||
---- | ---- | ||
For scrolling, multi-product vendors, you need to create a full profile. See the [[CasperVend_2/Profiles_and_groups | Profiles & Groups]] page for more details and | For scrolling, multi-product vendors, you need to create a full profile. See the '''[[CasperVend_2/Profiles_and_groups | Profiles & Groups]]''' page for more details and instructions on how to do this. | ||
# Rez the vendor | |||
# Grant debit permissions (the vendor won't function without them) | |||
# Access the vendor configuration page, by clicking the (C)asperVend logo in the bottom left hand corner of the vendor. | |||
# Look for the configuration options labelled "Actions" | |||
# Under Actions, look for "New Profile", and click it. | |||
# Give your profile a name, and click "Create". You'll be taken to a screen with two white boxes. | |||
# Select a product from the left white box that you want to show in the vendor, and click the [-->] button. This will add the product to the profile. Repeat with each additional product you want in the profile. <br />'''''NOTE:''' There is currently no way to select only some of the products. You can only move one at a time, or move them all at once, nothing in between.'' | |||
# When you're done, click "Finish". | |||
The profile will be saved and will be applied to your vendor within a couple minutes! | |||
The profile will be | Once you have configured the basics on any vendor, you can shift-drag them in "edit" mode and they '''will keep''' the configuration from the original vendor (group settings, affiliate percentages, etc.) - you will still need to answer debit permissions for the new copy, of course, but the only other thing you'll need to do is change the profile that is assigned to it. | ||
=== Why is the Same Product in all Panels? === | |||
---- | |||
CasperVend doesn't show "empty" panels like some other vending systems do. If you have fewer products set up than you have panels on the vendor, then you will see some/all of the products repeated multiple times to fill the vendor panels. '''This is normal.''' | |||
=== Turning a Non-Vendor Object Into a Vendor === | |||
---- | |||
'''Caveat:''' This is '''NOT''' recommended for furniture that gets sat on - the vendor script will soft-reset anytime an avatar sits or unsits, since LSL sees the act of "sitting" and reads it as a change in the linkset. We recommend the '''[[CasperVend_2/Holovendors | HoloVend]]''' expansion to display furniture instead. (If you purchased the Fat Pack, then HoloVend is already included.) | |||
# Take the vendor script AND "mapping" notecard out of the headless vendor into your inventory | |||
# Drop the script and notecard from your inventory into your product | |||
# Grant debit permissions (the vendor won't function without them) | |||
# Click the object, and select "Admin" | |||
# Log in to the website, if necessary | |||
# You will be taken to the configuration page for that vendor product | |||
# Change your options as desired | |||
# All set! | |||
=== Set Up Multiple Locations, Fast === | |||
---- | |||
# "Take A Copy" of the appropriate vendors from your main store | |||
# Rez them at the new location | |||
# Slide into place | |||
# Done! Yes, it's THAT easy! | |||
By taking copies of vendors you have already granted debit permissions to, you don't have to answer even more debit permissions windows at the new location(s). | |||
=== "Search" Option On Vendors === | |||
---- | |||
The "Search" feature on the multi-product vendors allows the customer to search within the products '''ON''' that vendor - searching what's in that vendor's profile - to see if anything matches the search term(s) they enter. The keywords section on each product listing contributes to what can be found using this feature. | |||
"Search" is a '''profile''' function, not a vendor function - so if you have a profile set to a single-item static vendor, you will still have "search" as an option in the popup menu when clicking the vendor, even if you only have one item in the profile. | |||
This feature, of course, has no impact on inworld SL land search. You will need to set up your own keyword prims if you want to have any effect on your shop's ability to be found in the inworld SL search. | |||
=== Affiliate Vendors === | |||
---- | |||
CasperVend allows you to set up affiliate vendors without having to buy an extra expansion pack! See the '''[[CasperVend_2/Affiliates | Affiliate Setup]]''' page for details and instructions. | |||
If you have already set up affiliate vendors for your products, and you want to give your affiliates instructions and information about them, see the '''[[CasperVend_2/Affiliate_Information | Information For Affiliates]]''' page instead. | |||
=== Showing Products in "Pages" === | |||
---- | |||
This is generally not recommended, because it this is non-standard behavior for CasperVend vendors, and some customers may be confused by the paging function when they expect the normal scrolling. | |||
Also, this only works with vendors 2.09 and up. | |||
# Log into CasperVend | |||
# Click "Profiles" | |||
# Edit the profile you want to have show products as pages | |||
# Tick the box for "Generate profiles as pages...." | |||
Make sure you ONLY use vendors with the same panels as what you select in the numbered pulldown in this option for that profile! If you use a vendor with fewer panels than you have set in this option, some products will '''never''' be seen! | |||
=== More Vendor Options === | |||
---- | |||
: '''Customising Your Vendors:''' To learn how to customise your vendors, see the '''[[CasperVend_2/Customisation | Customisation page]]''' for details | |||
: '''Sounds:''' To play/sell sounds on a vendor, see the '''[[CasperVend_2/Sounds | Sounds page]]''' | |||
: '''Quantity:''' To sell a quantity of items, such as fish bail, see the '''[[CasperVend_2/Quantity_Vendor | QuantityVend page]]''' | |||
: '''Textures:''' To sell textures, you will also need the '''[[CasperVend_2/TextureVend | TextureVend]]''' expansion pack. | |||
: '''Video:''' To show videos with a product, see the '''[[CasperVend_2/Video_Playback | Video Playback page]]''' | |||
= '''<span style="color:#00528c">Vending Management</span>''' = | |||
=== Test Transactions & Cleanup === | |||
---- | |||
If you are doing self-purchases (buying your own products) to test that the set up is working, then once you are done you may choose to: | |||
# Delete your transactions from the "sales" page. | |||
# Then go to the "customers" page | |||
# Find the link at the top right for regenerating the statistics and click that. | |||
# Wait. It might take multiple hours to complete. | |||
=== CSR Contact Points === | |||
---- | |||
# Go to the "Overview" tab on the CasperVend website | |||
# Add your CSR's account name in the CSR box | |||
# Click the "Save CSR" button | |||
# Done! | |||
If you add just one individual's name, the message that gets sent to the customer will include a link to the CSR's inworld profile. | |||
==== Multiple CSR's and other tricks ==== | |||
---- | |||
To add multiple CSR's, simply add all the account names, separated by a comma, in the CSR box. The message that gets sent to the customer will include ALL the names, but will NOT include any profile links. | |||
You may, instead, add a web address (for a contact form) or a SLURL (for a customer service center) instead, if you wish. | |||
==== CSR Limitations ==== | |||
---- | |||
Currently, CSR's are '''ONLY''' a contact point for your customers (for tech support, etc.) - they '''CANNOT''' do anything with your CasperVend products. | |||
Redeliveries (when your products are copiable) are handled by the customers themselves with a redelivery terminal, which your CSR's can lead the customer to. | |||
=== Group Invites (Automatic) === | |||
---- | |||
To be able to automatically invite users to your customer group with each purchase, start at the '''[[GroupBots | Group Bots page]]''' and select the page or section that deals with the bot you are currently using. | |||
=== Holo / Rezzing Demos === | |||
---- | |||
See the '''[[CasperVend_2/Holovendors | HoloVend page]]''' for information and instructions. | |||
=== No Managers in CasperVend === | |||
---- | |||
Currently, there is no facility in CasperVend for managers that do anything with your products under their own login. For security reasons, we do '''NOT''' recommend sharing your CasperVend account passwords, as that gives unrestricted access to your products. CasperTech is not responsible for what someone else does with your CasperVend account! | |||
The managerial feature is slated to be added to the future version of the CasperVend website. If you wish to be notified when this feature is added, click the "Monitor" button on '''[https://bugs.casperdns.com/view.php?id=10 this ticket].''' Simply replying on the ticket won't keep you updated. | |||
=== Overview Page Options === | |||
---- | |||
'''Auto Update System:''' This is the "OnRez" check for the vendors. If you send out affiliate vendors in a "no modify" state, you want to turn this OFF, otherwise your affiliates will keep getting bugged to update their vendors. | |||
=== PayPal, Credit Cards, Etc. === | |||
---- | |||
Linden Lab has [https://community.secondlife.com/t5/Featured-News/Concluding-the-Authorized-L-Reseller-Pilot-Program/ba-p/2941442 killed the Linden Dollar Reseller] program. Unfortunately, this also included the VirWox service that was used to provide this capability. This is not something Casper can work around. | |||
=== | === Profit Sharing === | ||
---- | ---- | ||
''' | See the '''[[CasperVend_2/Profit_Sharing | Profit Sharing]]''' page for details and instructions - you are able to do this on a per-product and/or per-vendor basis. | ||
=== Redeliveries === | |||
---- | |||
See the '''[[CasperVend_2/Redeliveries | Redeliveries]]''' page for details about the redelivery process and how to '''PROPERLY''' set your products as deliverable or non-deliverable. | |||
=== Upgrading Your Vendors === | |||
---- | |||
For information about how to upgrade your vendors (from an old version to a newer, or from free to premium/paid for example), see the '''[[CasperVend_2/Updating | Updating & Upgrading]]''' page. | |||
= '''<span style="color:#00528c">Scanning for Vendors</span>''' = | |||
=== Are you just trying to find a missing vendor? === | |||
---- | |||
If it is showing on the website, the sim/region link on the webpage may be copy/pasted inworld to lead you to where it last seen. | |||
=== Are you trying to find a vendor that dropped off the list? === | |||
---- | |||
Do not panic! It's normal for vendors to drop off the list as they idle and "go to sleep". They will wake up when they are clicked inworld (which will also make it reappear on the website list.) | |||
= '''<span style="color:#00528c">Sales, Discounts and Loyalty Rewards</span>'''= | |||
See the new '''[[CasperVend 2/Discounts | Discounts]]''' page for details on all the options. | |||
= '''<span style="color:#00528c">Transactions</span>''' = | |||
'''NOTE:''' If you delete a transaction (customer bought a copy item twice, or you arranged a swap for a different item) you will also need to recalculate the customer data (there's a link on the "Customers" page) - until you do, the "discounts" message will reflect - and bonuses for, if applicable - an incorrect total. | |||
== | === Importing Sales Data === | ||
---- | |||
To import your sales data from other networked vending systems, see the '''[[CasperVend_2/CSV_Import | sales data import]]''' page to see which systems are supported, and instructions on how to do so. | |||
== ''' | === Marketplace Sales Data === | ||
---- | |||
See the '''[[CasperVend_2/Marketplace_Link | Marketplace ANS Link]]''' page for setup instructions. | |||
=== Transaction Logs === | |||
---- | |||
Each inworld merchant sale notification message contains a link to a system log of the transaction - this is a feature unique to CasperVend. This log (more specifically, the "giant wall o' text" below the summary graphics) contains the details of each step that happened during the transaction, so you can see where the trouble is. This lets you resolve issues instead of just wondering why a product didn't get delivered. | |||
'''Getting YOUR "merchant link":'''<br /> | |||
Look in your local chat history. You should see a notification that looks similar to this: | |||
'''''CasperVend System: You just sold a ((product name)) to ((customer name)) for ((L$price)) in ((sim/region name)). View the transaction log here: ((clickable web link))''''' | |||
Simply click that link to be taken to your merchant transaction log. | |||
If the transaction log is confusing, you can compare the log to the '''[[CasperVend_2/Deliveries | transaction log analysis]]''' page for instructions on how to interpret what you find. | |||
You will get a transaction log from both Holovendors and regular vendors, but '''not''' from lucky chairs, gatchas, midnight madness boards, or TextureVend. | |||
=== Transaction Was Refunded? === | |||
---- | |||
Reasons why transactions may be refunded include: | |||
'''Can't find...''' | |||
:* System can't find the product | |||
:* System can't find a DropBox at all (either it's not rezzed, or not responding due to sim/region not communicating to/from the internet) | |||
'''Wrong price / wrong group''' | |||
:* Customer paid the wrong price (group discount when group tag not active, for example) | |||
:* Vendor is set to group only and customer doesn't have the correct group tag active | |||
'''Some restrictions apply''' | |||
:* If you have marked '''1 per person''' (in product listing), then customer attempted to buy twice for the same recipient | |||
:* If you have marked both '''duplicate copies restricted''' (in overview tab), and the item as '''COPY''' in the product listing, and then customer attempted to buy twice for same recipient | |||
:* If customer is banned, transaction will always be refused | |||
:* If you have affiliate vendors, and the affiliate is banned, transactions through THEIR vendors selling YOUR products will always be refunded | |||
:* If you have a TOS requirement, and the customer either declined or didn't answer the popup. | |||
= '''<span style="color:#00528c">Customer Updates</span>''' = | |||
=== Redeliveries === | |||
---- | |||
See the '''[[CasperVend_2/Redeliveries | Redeliveries page]]''' for details on the redelivery system and how to '''PROPERLY''' set your products as deliverable or non-deliverable. | |||
=== Sending product updates to customers === | |||
---- | |||
See the '''[[CasperVend_2/Updates | Sending Product Updates]]''' page for details and instructions. | |||
=== No Newsletter Mailer === | |||
---- | |||
There is no newsletter mailer option at this time; you'll have to use a third-party solution. | |||
= '''<span style="color:#00528c">Gifting Options</span>''' = | |||
'''Gift Cards:''' See the '''[[CasperVend_2/Gift_Cards | Gift Cards]]''' page for setup instructions | |||
: | '''Gift Boxes & Gifting:''' See the '''[[CasperVend_2/Gifts_%26_Giftboxes | Gifts & Gift Boxes]]''' page for details. | ||
''' | = '''<span style="color:#00528c">Expansion Packs & Promotional Tools</span>''' = | ||
CasperVend expansion packs allow you to do more with your store, integrated with your CasperVend system. These are the currently available expansion packs (click each name to be taken to that expansion's documentation page): | |||
:* '''[[CasperVend_2/Gatcha | Gatcha]]''' | |||
:* '''[[CasperVend_2/Gift_Cards | Gift Cards]]''' | |||
:* '''[[CasperVend_2/Holovendors | HoloVend]]''' | |||
:* '''[[CasperVend_2/Lucky_Chair | Lucky Chair]]''' | |||
:* '''[[CasperVend_2/Midnight_Madness | Midnight Madness]]''' | |||
:* '''[[CasperVend_2/Quantity_Vendor | Quantity Vendor]]''' | |||
:* '''[[CasperVend_2/TextureVend | Texture Vend]]''' | |||
= '''<span style="color:#00528c">Vendor API System</span>''' = | |||
For information on the read-only API, see the '''[[CasperVend_2/API | API page]]''' for details. This API information is intended for people who '''already''' know how to script, or can contract with someone who already knows how to script. | |||
= '''<span style="color:#00528c">Perks of Being a CasperTech Customer</span>''' = | |||
Add yourself to our '''[[Business_Directory | Business Directory]]'''! See the '''[[Adding_Your_Business_Listing | instructions on adding your business listing]]'''. | |||
= '''<span style="color:#00528c">FAQ / Troubleshooting</span>''' = | |||
There is a '''[[CasperVend_2/FAQ | General FAQ]]''' you can check, as well as the more specific FAQ's at the bottom of most of the sub-pages linked from this manual page. | |||
Latest revision as of 07:12, 12 October 2023
CasperVend Manual
This is the main manual page for CasperVend. If you need it, the table of contents for this page is to the right.
If you are here to see what's involved with setting up the system before buying it, you might also be interested in seeing the Feature List and find out Whats in the Box, in addition to the instructions below. If these instructions are too much for one sitting, you can also try the quick start page.
The Fine Print
Prerequisites
The manual on this page assumes the following:
- That you understand the setup processes behind web-enabled networked vending systems
- That you understand debit permissions need to be granted in order for all scripted vendors to function
- That you have at least one product to sell
- That you have at least one promotional image for each product to sell
- If your product is in multiple pieces (such as an outfit), that you have put the product in a shipping package of some sort.
If any of these concepts are unclear, or you have never extensively used a web-enabled networked vending system before, you should begin at the New User Quick Start instead, where the instructions are simplified and explained for people who are not as familiar with these concepts.
Allowable vs. Non-Allowable Items
Any product which is permitted to be sold in the grid it's available for - according to the grid's Terms of Service - is also permitted to be sold via CasperVend.
While not exhaustive, some items which are explicitly not allowed include:
- Any item(s) depicting or suggesting the abuse or sexual solicitation of minors
- Any item(s) which are designed to defraud or commit a crime (or entice others to defraud or commit a crime)
- Any item(s) which violate or are intended to violate or entice others to violate UK or international law
- Any items which violate the grid's Terms of Service (sim crashers, object spammers, copybot tools and the like)
DMCA's
PLEASE NOTE: CasperTech is not in control of products for sale in CasperVend vendors, only the vending system which can access them - this means we are not in a position to comply with a DMCA notice (we cannot actually remove the content from the virtual world grid). Each merchant is responsible for ensuring that their products do not violate anyone else's copyrights.
DMCA takedowns need to be filed with the owners of the virtual world grid directly, as it is their system (the grid) which is actually serving the content. In the case of Second Life, the owners are Linden Lab.
Terminology
CasperTech (and thus CasperVend) does do a few things differently from other web-enabled networked vending systems. This manual uses the following terms that may not be used by other web-enabled networked vending systems:
- DropBox - Your packaged products go in here, and are delivered to your customers from here. The DropBox MUST be rezzed at all times, or it will be unable to deliver products to your customers.
- Item - "Items" are the things you put inside your DropBox. "Items" can be your packaged products, informational notecards, landmarks, and so on.
- Product / Product Listing - These are created on the website using your items, and each listing includes information about your product including price and permissions. All product settings are on one page for ease of setup.
Your Account
Security Notes
Protect your business by following these tips, and keep your account safe.
- Choose a password which is difficult to guess.
- Do NOT use your Second Life password.
- Do NOT use a password you've used with any other Second Life related service, such as other vending systems.
- Do NOT give your password to anyone!
If you have trouble coming up with a secure password on your own, you can use the Gibson Research High Security Password Generator.
If you need a "password keeper" utility on windows, you can try Password Safe
Creating Your Account
Before you can begin setting up products on the website, you need to have a CasperVend account. If you already have one, just log in.
Otherwise, rez out a CasperVend vendor of your choice, grant debit permissions, and then follow the instructions on the Creating Your CasperVend Account page.
Resetting Your Password
See the section on Resetting your CasperVend Password
Setting Up Products
Setting Up Your Dropboxes
See the DropBoxes page for important details and instructions on setting up your DropBoxes.
If your DropBox(es) won't let you add things, pay careful attention to this section for troubleshooting points.
Set Up Product Listings
First, if you haven't already, rez a vendor and grant debit permissions.
Then:
- Click on the (C)asperVend logo in the bottom left hand corner of one of your vendors.
- Visit the link that appears in local chat, and enter your password if necessary.
- Now, click "Products" on the left hand side.
- Click "+ List New Product" to create a new product.
- Fill out details about your new product, then click Save.
- Pay attention to any menu/popup messages you receive - they have very important information!
If you are selling products that have a license the user needs to agree to, see the Product License page.
Minimum Essential Product Information
- Item to be delivered
- Name of product
- Vendor picture for product
- Price of product
- Permissions for product (this controls whether redelivery is allowed)
To see details about the various product options, read the product options page.
Getting the picture UUID: Right-click on the vendor image in your inventory (it needs to be full perm TO YOU) and select "copy UUID".
Listing Notes
You will note that it IS possible to set up a listing without delivering a product. This capability is useful for when you want to track sales but aren't vending something tangible that gets sent to the customer.
If the listing is not pointed TO the product, whether intentional or accidental, the transaction log will show the message:
"No item configured on this product for delivery, so skipping delivery phase."
New Version of Old Product
If you update an older product, just drop the new product in the vendor, and re-point product listing on the website to the new version.
Alternately, you can name the updated product to EXACTLY match the earlier version, delete the old version out of the dropbox, and replace it with the new version - and not have to edit the website listing at all.
Delivery Options
The default method is to use the scripted DropBox for all product deliveries.
If you are using a SmartBots Personal Bot, however, you can also take advantage of the bot delivery system. You are NOT REQUIRED to use a bot for delivery, but it is worth considering if you have products which are no-copy to the customer - the SmartBots bot delivery allows for a comfirmation of the product's arrival to the customer.
For information on using SmartBots for bot delivery, see the Bot Delivery page. (At this time, other bot systems do NOT offer the scripted feedback calls necessary for the bot delivery function.)
Product Permissions
One of the things the website asks for when you enter your product details is "permissions". Please be aware that this does not actually change the permissions set to your objects, but instead the information about the permissions will simply be told to the customer as an advisory.
In addition, any products which are set to COPY on the website will be claimable by customers as a redelivery - so be careful when setting this flag. See the redeliveries page for more information.
NOTE: The website cannot read or change permissions on anything you have in the dropbox. This is why it is CRITICAL to set your permissions properly on both your product AND the website.
- If you are selling items which are no-copy to you, the merchant/owner, (such as breedable items) see the Limited Availability page.
- If you are selling limited edition items (limited number on the grid, but merchant/owner has copy AND transfer permissions), see the Limited Edition page.
Set Up Product Variants (if desired/needed)
Here's how to set up a product variant:
- 1) Go to the product listing you want to make a variant OF.
- 2) Click "Add Variant", right above the blue PrimBay section.
- 3) To set up a product variant, add in the information for:
- Name (of product, as will be shown in statistics)
- Item (to be delivered) - use the pulldown to select the product. You may use the radio button for "only objects" to only show you product packages without also showing notecards, landmarks, etc.
- Texture (the picture for the vendor)
- Price
- customer permissions (this controls whether it can be redelivered, and does NOT set permissions on anything in the DropBox.)
At this time any OTHER options you wish to have that are different from the parent product (such as limiting how many can be sold inworld, or a holo/demo of a specific variant) are NOT able to be done with a variant - these will need to used on a full separate product listing.
Repeat the above steps for each variant you want to add to the parent product.
If the variant already exists, you may use the additional options to:
- Remove any existing marketplace association (if it was incorrectly associated)
- Delete the variant
- Detach the variant
Pros & Cons of Variants
Some merchants find it useful to list products as variants of a main product. Hair, clothing or shoes in different color packs can easily be set up as variants, or if you want to have a vendor picture display slightly different for an event, but do not want your main vendor location(s) to have the event-related picture.
Variants are currently (March 2014) treated as separate products everywhere BUT within the product listings. Each variant will have its own entry in your statistics (so you can track them separately), and may be added as individual items to different profiles and groups (so you can have all black shoes, all red shoes, etc.)
What Variants Can & Cannot Do
You are able to detach a variant to make the variant a full product with all options. however at this time you cannot turn a full-featured product into a variant of another.
You are able to point both a variant AND the primary product to the SAME product package in your DropBox.
Limited Items
CasperVend can handle items that are either limited in availability (no-copy items such as fish or breedables) as well as "limited editions" where you as the owner-merchant have both copy/transfer permissions, but you are only allowing a certain number to be sold on the grid.
For details on how to set up items which are no-copy to you, see the Limited Availability page.
For details on how to set up items which you, as the owner-merchant, have copy/transfer perms for, but are only allowing a limited number to be sold, see the Limited Edition page.
Giving Free Gifts To Customers Via Vendors
See the group gifts page for info.
Profiles & Groups
For information on how to group your products together and only show certain collections in certain vendors, see the Profiles & Groups page.
Updating Existing Products (Individually)
- Delete the original product package from the DropBox
- Rename the new product package to match the old product package name
- Drop the new product package in the DropBox.
- Wait for the DropBox to finish uploading data
- All set! As long as the new package has the SAME name as the old package, you don't need to change anything on the website.
If you have a different name on the product package for the new version (such as "v2" or the like) then:
- Delete the original product package from the DropBox
- Drop the new product package in the DropBox
- Wait for the DropBox to finish uploading data
- Log in to the CasperVend website
- Edit the product listing for the updated product
- Point the product listing to the NEW product package (see this page for details)
- Click "save" at the bottom.
- All set!
Updating Existing Products (in bulk)
The bulk update block is located below the product listings. This cannot be used to "bulk list" new items - it is only designed to bulk-update products that have already had listings set up.
You can use this section to globally update things like textures, prices, etc. that will take effect on ALL products currently selected. If you have not ticked any boxes, or have not used the "all" option at the bottom of the list, changes you make in the bulk section will NOT actually happen.
Setting Up Vendors
When you first rez a particular vendor, you will be asked for debit permissions. All vendors need debit permissions in order to function, but you should always read the orange/yellow popup to make sure it's YOUR vendor.
See the Debit Permissions page for a detailed explanation.
Configuring Single-Product Vendors
For vendors which are designed to show only one product, there is a shortcut you can use to quickly configure them.
- Rez the vendor
- Grant debit permissions (the vendor won't function without them)
- Access the vendor configuration page, by clicking the (C)asperVend logo in the bottom left hand corner of the vendor.
- Look for the configuration option called "Single Product"
- Simply switch the Single Product pulldown selector to the product you wish to show.
Once you have configured the basics on any vendor, you can shift-drag them in "edit" mode and they will keep the configuration from the original vendor (group settings, affiliate percentages, etc.) - you will still need to answer debit permissions for the new copy, of course, but the only other thing you'll need to do is change the single product that is assigned to it.
Configuring Multi-Product Vendors To Show Specific Products
For scrolling, multi-product vendors, you need to create a full profile. See the Profiles & Groups page for more details and instructions on how to do this.
- Rez the vendor
- Grant debit permissions (the vendor won't function without them)
- Access the vendor configuration page, by clicking the (C)asperVend logo in the bottom left hand corner of the vendor.
- Look for the configuration options labelled "Actions"
- Under Actions, look for "New Profile", and click it.
- Give your profile a name, and click "Create". You'll be taken to a screen with two white boxes.
- Select a product from the left white box that you want to show in the vendor, and click the [-->] button. This will add the product to the profile. Repeat with each additional product you want in the profile.
NOTE: There is currently no way to select only some of the products. You can only move one at a time, or move them all at once, nothing in between. - When you're done, click "Finish".
The profile will be saved and will be applied to your vendor within a couple minutes!
Once you have configured the basics on any vendor, you can shift-drag them in "edit" mode and they will keep the configuration from the original vendor (group settings, affiliate percentages, etc.) - you will still need to answer debit permissions for the new copy, of course, but the only other thing you'll need to do is change the profile that is assigned to it.
Why is the Same Product in all Panels?
CasperVend doesn't show "empty" panels like some other vending systems do. If you have fewer products set up than you have panels on the vendor, then you will see some/all of the products repeated multiple times to fill the vendor panels. This is normal.
Turning a Non-Vendor Object Into a Vendor
Caveat: This is NOT recommended for furniture that gets sat on - the vendor script will soft-reset anytime an avatar sits or unsits, since LSL sees the act of "sitting" and reads it as a change in the linkset. We recommend the HoloVend expansion to display furniture instead. (If you purchased the Fat Pack, then HoloVend is already included.)
- Take the vendor script AND "mapping" notecard out of the headless vendor into your inventory
- Drop the script and notecard from your inventory into your product
- Grant debit permissions (the vendor won't function without them)
- Click the object, and select "Admin"
- Log in to the website, if necessary
- You will be taken to the configuration page for that vendor product
- Change your options as desired
- All set!
Set Up Multiple Locations, Fast
- "Take A Copy" of the appropriate vendors from your main store
- Rez them at the new location
- Slide into place
- Done! Yes, it's THAT easy!
By taking copies of vendors you have already granted debit permissions to, you don't have to answer even more debit permissions windows at the new location(s).
"Search" Option On Vendors
The "Search" feature on the multi-product vendors allows the customer to search within the products ON that vendor - searching what's in that vendor's profile - to see if anything matches the search term(s) they enter. The keywords section on each product listing contributes to what can be found using this feature.
"Search" is a profile function, not a vendor function - so if you have a profile set to a single-item static vendor, you will still have "search" as an option in the popup menu when clicking the vendor, even if you only have one item in the profile.
This feature, of course, has no impact on inworld SL land search. You will need to set up your own keyword prims if you want to have any effect on your shop's ability to be found in the inworld SL search.
Affiliate Vendors
CasperVend allows you to set up affiliate vendors without having to buy an extra expansion pack! See the Affiliate Setup page for details and instructions.
If you have already set up affiliate vendors for your products, and you want to give your affiliates instructions and information about them, see the Information For Affiliates page instead.
Showing Products in "Pages"
This is generally not recommended, because it this is non-standard behavior for CasperVend vendors, and some customers may be confused by the paging function when they expect the normal scrolling.
Also, this only works with vendors 2.09 and up.
- Log into CasperVend
- Click "Profiles"
- Edit the profile you want to have show products as pages
- Tick the box for "Generate profiles as pages...."
Make sure you ONLY use vendors with the same panels as what you select in the numbered pulldown in this option for that profile! If you use a vendor with fewer panels than you have set in this option, some products will never be seen!
More Vendor Options
- Customising Your Vendors: To learn how to customise your vendors, see the Customisation page for details
- Sounds: To play/sell sounds on a vendor, see the Sounds page
- Quantity: To sell a quantity of items, such as fish bail, see the QuantityVend page
- Textures: To sell textures, you will also need the TextureVend expansion pack.
- Video: To show videos with a product, see the Video Playback page
Vending Management
Test Transactions & Cleanup
If you are doing self-purchases (buying your own products) to test that the set up is working, then once you are done you may choose to:
- Delete your transactions from the "sales" page.
- Then go to the "customers" page
- Find the link at the top right for regenerating the statistics and click that.
- Wait. It might take multiple hours to complete.
CSR Contact Points
- Go to the "Overview" tab on the CasperVend website
- Add your CSR's account name in the CSR box
- Click the "Save CSR" button
- Done!
If you add just one individual's name, the message that gets sent to the customer will include a link to the CSR's inworld profile.
Multiple CSR's and other tricks
To add multiple CSR's, simply add all the account names, separated by a comma, in the CSR box. The message that gets sent to the customer will include ALL the names, but will NOT include any profile links.
You may, instead, add a web address (for a contact form) or a SLURL (for a customer service center) instead, if you wish.
CSR Limitations
Currently, CSR's are ONLY a contact point for your customers (for tech support, etc.) - they CANNOT do anything with your CasperVend products.
Redeliveries (when your products are copiable) are handled by the customers themselves with a redelivery terminal, which your CSR's can lead the customer to.
Group Invites (Automatic)
To be able to automatically invite users to your customer group with each purchase, start at the Group Bots page and select the page or section that deals with the bot you are currently using.
Holo / Rezzing Demos
See the HoloVend page for information and instructions.
No Managers in CasperVend
Currently, there is no facility in CasperVend for managers that do anything with your products under their own login. For security reasons, we do NOT recommend sharing your CasperVend account passwords, as that gives unrestricted access to your products. CasperTech is not responsible for what someone else does with your CasperVend account!
The managerial feature is slated to be added to the future version of the CasperVend website. If you wish to be notified when this feature is added, click the "Monitor" button on this ticket. Simply replying on the ticket won't keep you updated.
Overview Page Options
Auto Update System: This is the "OnRez" check for the vendors. If you send out affiliate vendors in a "no modify" state, you want to turn this OFF, otherwise your affiliates will keep getting bugged to update their vendors.
PayPal, Credit Cards, Etc.
Linden Lab has killed the Linden Dollar Reseller program. Unfortunately, this also included the VirWox service that was used to provide this capability. This is not something Casper can work around.
Profit Sharing
See the Profit Sharing page for details and instructions - you are able to do this on a per-product and/or per-vendor basis.
Redeliveries
See the Redeliveries page for details about the redelivery process and how to PROPERLY set your products as deliverable or non-deliverable.
Upgrading Your Vendors
For information about how to upgrade your vendors (from an old version to a newer, or from free to premium/paid for example), see the Updating & Upgrading page.
Scanning for Vendors
Are you just trying to find a missing vendor?
If it is showing on the website, the sim/region link on the webpage may be copy/pasted inworld to lead you to where it last seen.
Are you trying to find a vendor that dropped off the list?
Do not panic! It's normal for vendors to drop off the list as they idle and "go to sleep". They will wake up when they are clicked inworld (which will also make it reappear on the website list.)
Sales, Discounts and Loyalty Rewards
See the new Discounts page for details on all the options.
Transactions
NOTE: If you delete a transaction (customer bought a copy item twice, or you arranged a swap for a different item) you will also need to recalculate the customer data (there's a link on the "Customers" page) - until you do, the "discounts" message will reflect - and bonuses for, if applicable - an incorrect total.
Importing Sales Data
To import your sales data from other networked vending systems, see the sales data import page to see which systems are supported, and instructions on how to do so.
Marketplace Sales Data
See the Marketplace ANS Link page for setup instructions.
Transaction Logs
Each inworld merchant sale notification message contains a link to a system log of the transaction - this is a feature unique to CasperVend. This log (more specifically, the "giant wall o' text" below the summary graphics) contains the details of each step that happened during the transaction, so you can see where the trouble is. This lets you resolve issues instead of just wondering why a product didn't get delivered.
Getting YOUR "merchant link":
Look in your local chat history. You should see a notification that looks similar to this:
CasperVend System: You just sold a ((product name)) to ((customer name)) for ((L$price)) in ((sim/region name)). View the transaction log here: ((clickable web link))
Simply click that link to be taken to your merchant transaction log.
If the transaction log is confusing, you can compare the log to the transaction log analysis page for instructions on how to interpret what you find.
You will get a transaction log from both Holovendors and regular vendors, but not from lucky chairs, gatchas, midnight madness boards, or TextureVend.
Transaction Was Refunded?
Reasons why transactions may be refunded include:
Can't find...
- System can't find the product
- System can't find a DropBox at all (either it's not rezzed, or not responding due to sim/region not communicating to/from the internet)
Wrong price / wrong group
- Customer paid the wrong price (group discount when group tag not active, for example)
- Vendor is set to group only and customer doesn't have the correct group tag active
Some restrictions apply
- If you have marked 1 per person (in product listing), then customer attempted to buy twice for the same recipient
- If you have marked both duplicate copies restricted (in overview tab), and the item as COPY in the product listing, and then customer attempted to buy twice for same recipient
- If customer is banned, transaction will always be refused
- If you have affiliate vendors, and the affiliate is banned, transactions through THEIR vendors selling YOUR products will always be refunded
- If you have a TOS requirement, and the customer either declined or didn't answer the popup.
Customer Updates
Redeliveries
See the Redeliveries page for details on the redelivery system and how to PROPERLY set your products as deliverable or non-deliverable.
Sending product updates to customers
See the Sending Product Updates page for details and instructions.
No Newsletter Mailer
There is no newsletter mailer option at this time; you'll have to use a third-party solution.
Gifting Options
Gift Cards: See the Gift Cards page for setup instructions
Gift Boxes & Gifting: See the Gifts & Gift Boxes page for details.
Expansion Packs & Promotional Tools
CasperVend expansion packs allow you to do more with your store, integrated with your CasperVend system. These are the currently available expansion packs (click each name to be taken to that expansion's documentation page):
Vendor API System
For information on the read-only API, see the API page for details. This API information is intended for people who already know how to script, or can contract with someone who already knows how to script.
Perks of Being a CasperTech Customer
Add yourself to our Business Directory! See the instructions on adding your business listing.
FAQ / Troubleshooting
There is a General FAQ you can check, as well as the more specific FAQ's at the bottom of most of the sub-pages linked from this manual page.