Corrade: Difference between revisions
Jump to navigation
Jump to search
No edit summary |
No edit summary |
||
| Line 64: | Line 64: | ||
| [[File:RobotArmy-Corrade.png|300px|thumb|left|Corrade bot info]] | | [[File:RobotArmy-Corrade.png|300px|thumb|left|Corrade bot info]] | ||
|- | |- | ||
| valign="top" | If you've selected '''Corrade | | valign="top" | If you've selected '''Corrade''' you'll see this screen. Remember that: <br /><ol><li>'''Label''' = Display name of that bot as you want it to appear in your bots list.</li><li>Corrade will accept letters, numbers and symbols in the Security Code.</li></ol><br />Once you are done entering in setup information, click the "Next" button. If you've missed information that is required, there will be a popup screen to tell you what you're missing when you click "Next". | ||
| [[File:RobotArmy-CorradeSetup.png|300px|thumb|left|Click for larger image]] | | [[File:RobotArmy-CorradeSetup.png|300px|thumb|left|Click for larger image]] | ||
|- | |- | ||
Revision as of 21:48, 18 October 2016
Corrade Support Information
- Inworld group: Wizardry and Steamworks:Support
- Contact: Kira Komarov
Download Links
- Windows:
- Linux - Debian
- Linux - FreeBSD
- Raspberry Pi
Windows Installation
These instructions are provided by Aphrodite Atlas.
- 1) Download the latest Corrade Progressive 9.106 or later - Progressive 9.91 has issues with multiple groups - (this has the "configurator" utility for easier setup)
- 2) Unpack the .zip file to the location you want it to run from
- 3) Run configurator.exe to configure your bot
- 4) On the Client tab:
- A) Input the bot account's name
- B) Input the bot account's password
- C) Change start location to desired location (provide a SLURL if you don't want "last location" or "home" used.)
- D) Save the file as "Corrade.ini"
- 5) On the Masters tab:
- E) Remove the example master names
- F) Click the Add Master button
- G) Add yourself as a master
- H) Save the file as Corrade.ini
- 6) On the Groups tab:
- I) Remove (or edit) the example groups
- J) Remember to click Add Group when creating a new group
- K) Replace with info for the group you want the bot to give invitations to and handle ejects for
- L) Under group permissions you MUST check/tick the "groups" box, anything else is optional
- M) The password you enter on this tab is your "Security Code" - this is not the SL account password! Numbers, letters, symbols are ok.
- N) "Workers" = maximum simultaneous tasks. Up to 10 for best results.
- O) Specify a database in the form of databasename.db'
- P) Specify a log file location and filename if you enable chat logging
- Q) Save the file as Corrade.ini
- 7) Run Corrade
- R) From Windows, go Start > Run > cmd.exe as ADMINISTRATOR
- S) cd into the directory in which you unpacked Corrade
- T) At the command line, type Corrade.exe and hit enter.
Corrade as a Windows Service
Information on how to set up Corrade as a service (so it auto restarts) is located on the Grimore site
Note: It is recommended when you set it up as a service to use "Auto Delayed Start".
Adding Corrade Bots to CasperTech Products
Adding Corrade to CasperLet
| Steps to perform | Reference Image |
|---|---|
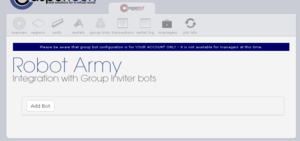
| Log in to CasperLet, go to the Group Bots page and click the "Add New" button. (If you already have existing bots set up, you will see a list of bots under the "Add New" button - if you wish to edit an existing bot configuration, click the "Edit" button next to the name of the bot you want to edit instead.) |
 |
| Use the pulldown to select your bot type. | 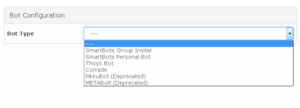 |
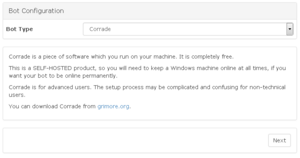
You will be presented with information about:
These screen assumes your choice is Corrade. |
 |
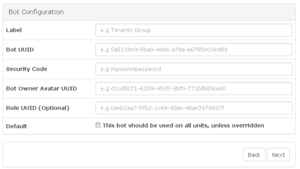
If you've selected Corrade you'll see this screen. Remember that:
Once you are done entering in setup information, click the "Next" button. If you've missed information that is required, there will be a popup screen to tell you what you're missing when you click "Next". |
 |
| Now you will arrive at the test screen. Click the blue "Test Now" button to begin testing the configuration. | 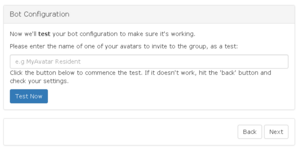 |
| You will get a "Please Wait" window while the test is in progress, as shown here. |  |
| If you have an error in your bot configuration, you'll get an additonal popup with the error message. This is a sample of what the error message popup will say - there will be different errors depending on the configuration issue, and the selected bot. |
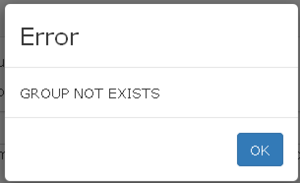 |
| If the test of your configuration was a success, you will see this message. | 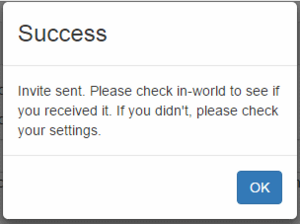 |
| Clicking "OK" on the Success screen will automatically take you back to the main bots page, with your newly configured bot appearing in the list. An example of a list of bots may be seen in this image. |
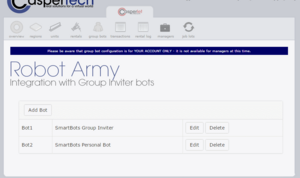 |
Using CasperLet Bots on a Per-Unit Basis
| Steps to perform | Reference Image |
|---|---|
| Adding a bot on a per-unit basis requires the bot to already be set up. You should see a list of bots if this has already been done, similar to this reference image. If you have no bots in the list, you need to create your bot(s). |  |
| Edit the individual unit configuration, and scroll down until you get to the "Group Invite Bots" line. | |
| Use the pulldown to find the display/label name of your bot to use for group invites from this rental unit, and click the "Add" button. | 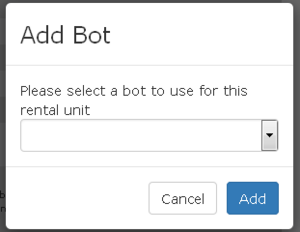 |
