CasperVend 2/VIP Lists: Difference between revisions
Jump to navigation
Jump to search
| Line 39: | Line 39: | ||
== '''<span style="color:#00528c">Add to Your VIP List - Manually</span>''' == | == '''<span style="color:#00528c">Add to Your VIP List - Manually</span>''' == | ||
:# Go to your '''[https://caspervend.casperdns.com/index.php Overview tab]''' | |||
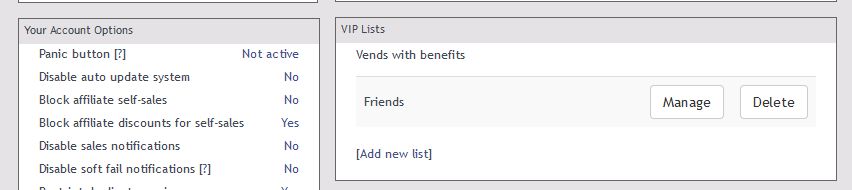
:# Scroll down to the VIP lists block, in the far-right column. '''([https://wiki.casperdns.com/images/5/5c/Where_to_find_VIP_lists.jpg see image])''' | |||
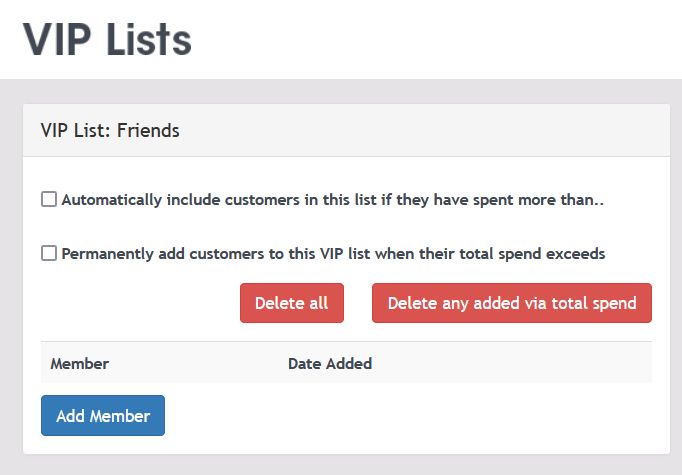
:# Click "Manage" button - you will arrive at the list page for that particular VIP list. '''([https://wiki.casperdns.com/images/4/4b/VIP_List_Page.jpg see image])''' | :# Click "Manage" button - you will arrive at the list page for that particular VIP list. '''([https://wiki.casperdns.com/images/4/4b/VIP_List_Page.jpg see image])''' | ||
:# Click the blue "Add Member" button. | :# Click the blue "Add Member" button. | ||
| Line 45: | Line 47: | ||
:# The page will refresh, and show you the VIP list with the new name added. | :# The page will refresh, and show you the VIP list with the new name added. | ||
VIP member list will ALSO show the date they were added. | The VIP member list will ALSO show the date they were added, and have a "Delete" button at the far right for each avatar. | ||
== '''<span style="color:#00528c">Remove From Your VIP List - Manually</span>''' == | == '''<span style="color:#00528c">Remove From Your VIP List - Manually</span>''' == | ||
Revision as of 19:30, 4 August 2024
VIP Lists are a powerful feature in Caspervend which allow you to give benefits to certain lists of customers.
Using this feature, you can:
- Make as many different lists as you want
- Restrict products to be only purchasable by VIPs (Purchaser must be in thee list)
- Restrict products to only be deliverable to VIPs (Recipient must be in the list)
- Or both of the above
- Allow VIPs to bypass a product start/end date, allowing you to release early to VIPs
- Automatically add a customer to a list when they purchase a specific product
- Automatically include members in a VIP list if they have spent more than a certain amount of L$ in a month
- Deliver extra items to VIPs
Create Your VIP List
- Go to your Overview tab
- Scroll down to the VIP lists block, in the far-right column. (see image)
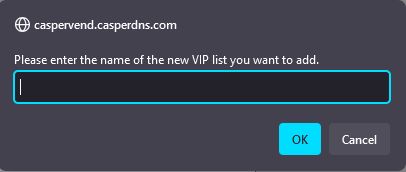
- Click "Add New List" - you will get a popup. (see image)
- Enter the name of the list, then click the blue "Ok" button.
- The page will refresh, and your new VIP list will be shown.
Manage Your VIP List - Automatically
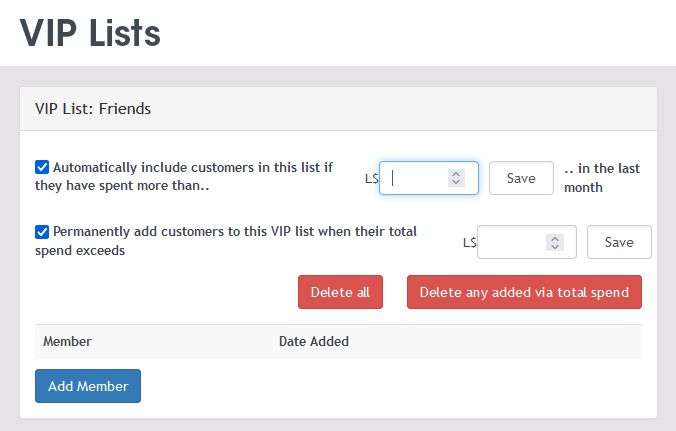
If you wish to use the automatic options, there are two tickboxes at the top of the page.
One will auto-add people if they've spent a certain amount per month in your store (and will remove them at the end of the month.)
The other is a permanent add after spending a certain amount in your store.
- Click "Manage" button - you will arrive at the list page for that particular VIP list. (see image)
- Tick one or both of the boxes at the top of the page.
- Each box ticked will open up a L$ entry box - just enter in the total of Lindens you want the customer to have spent in your store for each one.
- Then click the "SAVE" button for EACH ONE you have entered numbers in. (see image)
- You will get a popup saying "Saved!" - just click the blue "ok" button.
Add to Your VIP List - Manually
- Go to your Overview tab
- Scroll down to the VIP lists block, in the far-right column. (see image)
- Click "Manage" button - you will arrive at the list page for that particular VIP list. (see image)
- Click the blue "Add Member" button.
- You will get a popup asking you to add the account (legacy) name of the VIP member you wish to add. This is NOT the display name!
- When done, click the blue "Ok" button.
- The page will refresh, and show you the VIP list with the new name added.
The VIP member list will ALSO show the date they were added, and have a "Delete" button at the far right for each avatar.
Remove From Your VIP List - Manually
We're working on documenting this.
However, put shortly:
- Manage your lists from the Overview tab
- Set VIP options when editing a product
Set VIP List Options in Products Listings
- Go to your products page
- "EDIT" the relevant listing.
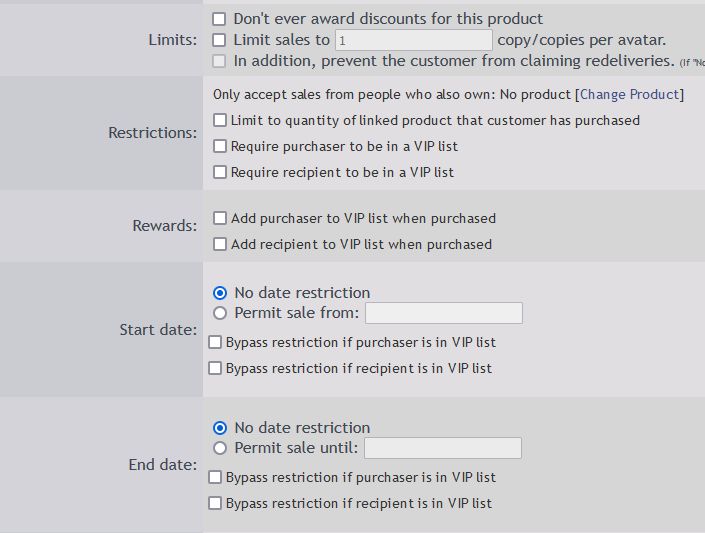
- Scroll down until you see the restrictions and rewards settings. (see image)
- Tick a box to enable the VIP setting. You will get an "Add List" button
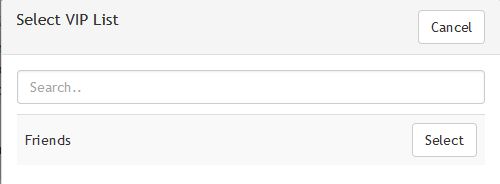
- Click "Add List" - you will get a "Select VIP List" popup. (see image)
- Select the list you want to add to that option.
- You may add multiple lists to the same option on the same product! Just click "Add List" to add more!
- Repeat for each option you want to have a VIP list setting.
- Remember to scroll down to the bottom and click "SAVE"!